
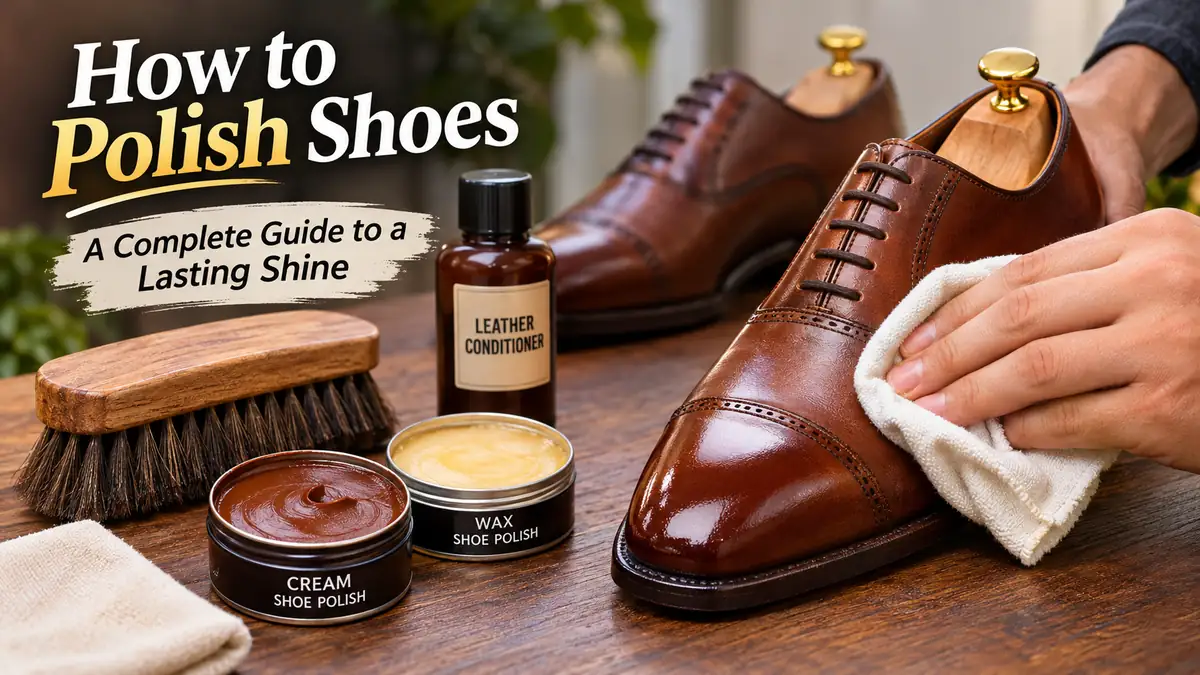
A well-polished pair of shoes can make an old outfit look sharper and help quality leather footwear stay in good condition for years. But applying too much polish, using the wrong brush, or skipping the cleaning stage can leave shoes looking dull, patchy, or sticky.
Learning how to polish shoes properly is about more than making leather shine. The process removes surface dirt, restores color, reduces the appearance of scuffs, and helps protect the leather finish from everyday wear.
To polish shoes, remove the laces, brush away dirt, clean and dry the leather, and apply a thin layer of matching shoe polish. Allow the polish to set, then buff with a horsehair brush. For extra shine, use a soft cotton cloth and small amounts of wax polish, particularly on the toe and heel.
The right method depends on the shoe material, the type of polish, and the finish you want. Smooth leather dress shoes respond particularly well to traditional polishing, while suede, nubuck, patent leather, and synthetic materials need different care.
What You Need to Polish Shoes Properly
You don’t need an expensive shoe-care kit to achieve a professional-looking finish. A few suitable tools and products are enough for routine maintenance.
| Tool or product | Purpose | Best use |
|---|---|---|
| Horsehair brush | Removes dust and buffs polish | Cleaning and final shine |
| Soft cotton cloth | Applies and spreads polish | Controlled application |
| Leather cleaner | Removes accumulated grime | Before conditioning |
| Leather conditioner | Helps maintain leather flexibility | Smooth finished leather |
| Cream shoe polish | Refreshes color and provides a gentle shine | Regular maintenance |
| Wax shoe polish | Creates a protective, glossy finish | Dress shoes and toe caps |
| Welt brush | Reaches seams and narrow edges | Detailed cleaning |
| Shoe trees | Support the shoe’s shape | Polishing and storage |
| Clean water | Helps with light cleaning and optional mirror finishing | Used sparingly |
A clean, soft cotton T-shirt can substitute for a dedicated polishing cloth. However, a horsehair brush is particularly useful because its relatively soft bristles distribute polish and develop a shine without the harsh abrasion of a stiff cleaning brush.
Cream polish vs. wax polish
Cream and wax polishes perform related but different functions.
Cream shoe polish generally contains pigments, oils, and waxes in a softer formulation. It is useful for refreshing faded color, disguising minor scuffs, and producing a natural satin finish.
Wax shoe polish contains a higher proportion of hard waxes and is especially effective at creating a glossy surface. It works well on structured toe caps and heels, where a smooth finish is easier to build.
For everyday leather footwear, cream polish may be sufficient. For a formal Oxford or Derby shoe, a light application of cream followed by carefully buffed wax can provide a more refined appearance.
Neither product replaces proper leather cleaning or conditioning.
How to Polish Shoes Step by Step
Cura Scarpe in Pelle: Guida Completa 2026 | Milano – Le Scarpe di Campagna
Blog – Shoe Tips, Trends & Guides | shoe.lk
【日本橋髙島屋S.C.店】《日本橋限定 匠友二郎》10/23(金)販売開始!:SHOP BLOG|三陽山長
13
The following method works best for smooth, finished leather shoes, including many Oxfords, Derbies, loafers, and leather boots.
Step 1: Remove the laces and prepare the shoes
Start by removing the shoelaces. This gives you better access to the tongue, eyelets, and areas around the facing.
Insert appropriately sized cedar shoe trees if available. They help maintain the shape of the shoe and reduce creasing while you work.
Place the shoes on a protected, stable surface with good lighting. Shoe polish can stain fabric, unfinished wood, and other porous materials.
Examine the leather for scratches, worn areas, loose stitching, or cracks before applying anything.
Step 2: Brush away dirt and dust
Use a clean horsehair brush to remove loose dirt from the entire shoe.
Pay attention to the welt, the seam where the upper meets the sole, the heel edges, and the folds across the vamp.
If dirt remains in these areas, polishing can spread it across the leather and interfere with an even finish.
For stubborn dirt, wipe the shoes with a slightly damp cloth or use a leather cleaner formulated for finished footwear. Avoid soaking the leather.
Allow the shoes to dry naturally before continuing. Keep them away from radiators, hair dryers, and direct intense heat, which can damage leather and its finish.
Step 3: Condition the leather when needed
Leather conditioner helps maintain flexibility, particularly when shoes feel dry or have been cleaned thoroughly.
Apply a small amount of conditioner to a clean cloth and work it gently across the leather according to the product instructions.
Allow it to absorb, then wipe away any remaining residue.
Conditioning is not necessary every time you polish. Overconditioning can leave leather overly soft, greasy, or difficult to shine.
For shoes worn regularly, occasional conditioning based on the leather’s condition is more useful than applying conditioner automatically before every polish.
Always test a new conditioner on a discreet area first because some formulations can darken leather.
Step 4: Apply a thin layer of shoe polish
Choose a polish that matches the leather color as closely as possible.
Black polish is suitable for black leather. Brown shoes may require light brown, medium brown, dark brown, or another shade depending on their original finish.
Neutral polish is an alternative when an exact color match is difficult, although it will not restore faded pigmentation in the same way as a colored cream.
Wrap a clean cotton cloth around two fingers and collect a small amount of polish.
Apply it using gentle circular movements, spreading a thin, even layer across the upper.
Focus on scuffed areas, the toe, and the heel, but avoid leaving thick deposits in stitching, perforations, or deep creases.
The most common polishing mistake is using too much product. A thin coat is easier to buff, produces a cleaner finish, and is less likely to leave wax buildup.
Step 5: Let the polish set
Give the polish time to settle on the leather.
The appropriate waiting period depends on the formulation, temperature, and manufacturer’s instructions. Many traditional polishes benefit from several minutes before buffing.
Avoid treating a specific waiting time as universal. Some cream products are designed to be buffed almost immediately, while certain waxes benefit from a longer setting period.
If the surface still feels tacky, you may have applied too much polish.
Step 6: Buff with a horsehair brush
Use a clean, dry horsehair brush and move it briskly across the leather with light pressure.
Work over the toe, sides, vamp, and heel.
Buffing smooths the wax layer and develops its sheen. The goal is not to scrub the leather aggressively but to create an even surface.
A soft cloth can then be used for a final buff, especially around smaller details.
At this stage, shoes treated with cream polish should have a clean, attractive finish suitable for everyday use.
Step 7: Add wax polish for extra shine
For a glossier result, apply a very thin layer of wax polish to the toe cap and heel counter.
These structured areas are generally better suited to high-shine polishing because they flex less than the vamp.
Let the wax set according to its instructions, then buff with a soft cloth or horsehair brush.
Repeat with thin layers only if additional shine is needed.
Avoid building heavy wax layers across flexible creases. Hard wax can crack or develop an uneven appearance when the leather bends repeatedly.
Step 8: Finish and replace the laces
Inspect the shoes under natural or even indoor lighting.
Remove any excess polish around stitching, eyelets, and the sole edges. Wipe the welt carefully if polish has collected there.
Replace the laces once the surface is dry and no longer transfers polish to your fingers.
The shoes should now look cleaner, more uniform in color, and noticeably shinier.
How to Polish Shoes to a Mirror Shine
A mirror shine, sometimes called a spit shine or bull shine, is a highly reflective finish created by building and smoothing thin layers of hard wax.
It is traditionally associated with formal leather dress shoes, military footwear, and ceremonial uniforms.
The mirror-shine method
- Clean and polish the shoes normally, allowing the base polish to set.
- Apply a tiny amount of hard wax polish to the toe cap with a soft cotton cloth.
- Use gentle circular movements to distribute the wax evenly.
- Allow the layer to set before adding another very thin coat.
- When appropriate for the wax product, add a drop of clean water to the cloth to reduce friction while smoothing the surface.
- Continue working lightly until the wax develops a smooth, reflective appearance.
- Finish with an exceptionally light buff using a clean section of cloth.
A mirror shine can require considerable patience, particularly when the leather has a textured surface.
The result depends on the smoothness of the underlying leather, the polish formulation, and the consistency of the wax layers.
Why does water help create a mirror shine?
A tiny amount of water can reduce friction between the polishing cloth and the wax surface, allowing the wax to be smoothed without immediately dragging or disturbing it.
Water is not what creates the shine by itself. The reflective finish comes primarily from the smooth, built-up wax surface.
Use only minimal moisture. Excess water can interfere with the process and may leave spots on sensitive leather.
Some polishing methods use saliva, which explains the traditional term spit shine, but clean water is a more hygienic alternative.
Where should you avoid a mirror shine?
Avoid building a thick, rigid wax finish on parts of the shoe that bend during walking.
The vamp, particularly across the ball of the foot, experiences repeated flexing. Heavy wax layers in these areas are more likely to crack, flake, or look cloudy.
Concentrate the highest shine on relatively rigid toe caps and heel counters.
How to Polish Different Types of Shoes
Not every shoe should be treated with conventional cream or wax polish. The material determines which cleaning and finishing method is appropriate.
| Shoe material | Recommended care | What to avoid |
|---|---|---|
| Smooth finished leather | Leather cleaner, suitable cream or wax polish | Excessive water and thick polish |
| Suede | Suede brush and suitable suede cleaner | Ordinary wax or cream polish |
| Nubuck | Nubuck brush and material-specific care products | Traditional leather polish |
| Patent leather | Soft cloth and compatible patent-leather cleaner | Heavy wax buildup |
| Synthetic leather | Damp cloth and manufacturer-approved cleaner | Unverified solvent-based products |
| Canvas | Gentle fabric cleaning | Leather shoe polish |
| Oiled or waxed leather | Compatible conditioning or reproofing products | Standard high-shine polish unless approved |
How to polish black leather shoes
Black leather is relatively straightforward to maintain because matching black cream polish is widely available.
Remove dust, clean the leather, and apply a thin layer of black polish.
Buff thoroughly with a horsehair brush.
For a formal black Oxford, add hard wax to the toe cap to create a deeper, more reflective finish.
Be careful around contrasting stitching or light-colored sole edges because black pigment can stain them.
How to polish brown leather shoes
Brown leather requires more attention to color matching.
A dark brown polish on light tan leather can noticeably alter its appearance, particularly around seams and creases.
Test colored polish in a discreet location before treating the entire shoe.
For burnished or intentionally shaded leather, a neutral polish or a carefully selected shade may preserve the existing color variation better than a strongly pigmented product.
Can you polish suede shoes?
Traditional shoe polish should not be applied to suede.
Suede has a raised, fibrous surface called a nap. Wax and cream polish can flatten the fibers, stain the material, and create permanent-looking dark patches.
Instead, use a suede brush to lift dirt and restore the nap.
For marks that resist brushing, try a suede eraser or a suitable suede cleaner, following the product instructions.
Allow the material to dry fully before brushing again.
Can you polish patent leather?
Patent leather already has a glossy coated surface, so conventional polishing is generally unnecessary.
Wipe it with a soft, slightly damp cloth and use a cleaner specifically compatible with patent leather when needed.
Avoid abrasive brushes and strong solvents that can scratch, cloud, or damage the coating.
Patent leather does not develop a traditional wax mirror shine in the same way as smooth calfskin.
How to care for leather boots
Leather boots may collect more mud, salt, and moisture than dress shoes.
Remove dirt carefully and allow wet boots to dry naturally before applying suitable care products.
For smooth finished leather boots, cream polish may refresh color and appearance.
However, rugged boots made from oiled leather, waxed leather, or other specialty finishes may require dedicated conditioning or waterproofing products instead.
Always follow the footwear manufacturer’s guidance when it differs from a general polishing method.
How Often Should You Polish Your Shoes?
Polishing frequency depends on how often you wear the shoes, the weather, and how quickly the finish becomes dull.
There is no need to apply polish after every wear. Regular brushing and occasional conditioning can often maintain leather effectively between polishing sessions.
| Usage pattern | Suggested polishing frequency |
|---|---|
| Daily leather dress shoes | Every 2–4 weeks, or as needed |
| Office shoes worn several times weekly | Every 3–6 weeks |
| Formal shoes worn occasionally | Before an event or when dull |
| Leather boots used outdoors | After cleaning, when the finish needs refreshing |
| Shoes kept in storage | Inspect periodically; polish only when necessary |
These are practical guidelines rather than fixed requirements. For example, Dr. Martens recommends polishing suitable boots approximately every four to six weeks, depending on wear. Dr. Martens™+1
Signs your shoes need polishing
Look for a dull finish, faded color, visible minor scuffs, or uneven shine.
If the leather feels dry or stiff, consider whether it needs conditioning rather than simply another coat of polish.
If the shoes are already shiny and clean, brushing may be all that is necessary.
How to Polish Shoes Without Shoe Polish
If you don’t have shoe polish available, you can still improve the appearance of smooth leather shoes through careful cleaning and buffing.
However, these alternatives cannot fully reproduce the color restoration or high-gloss finish of conventional cream and wax polish.
Use a soft cloth and horsehair brush
Remove dust with a soft brush, then wipe the leather using a barely damp cloth if necessary.
Allow the surface to dry before buffing briskly with a horsehair brush.
This can restore some of the leather’s natural sheen without introducing additional products.
Use a suitable leather conditioner
A compatible leather conditioner may improve the appearance of dry, dull leather.
Apply a very small amount, following the manufacturer’s directions, and buff away any residue.
Some conditioning products leave a gentle satin finish, although they generally do not create the reflective shine of hard wax.
Can you use olive oil or petroleum jelly?
Household substances such as olive oil, coconut oil, and petroleum jelly are sometimes suggested as homemade shoe-polish substitutes.
They are not reliable choices for finished leather shoes.
Cooking oils can darken leather, attract dirt, or leave unwanted residues. Petroleum jelly may produce temporary surface gloss but can create buildup and is not a substitute for a formulated leather-care product.
For valuable leather footwear, cleaning and brushing are safer temporary options than experimenting with household oils.
Common Shoe Polishing Mistakes and How to Avoid Them
Even a good shoe polish can produce disappointing results when applied incorrectly.
Applying too much polish
A thick layer of cream or wax can leave the surface sticky, uneven, or cloudy.
Use small quantities and add another layer only after the previous application has been properly buffed.
Polishing dirty shoes
Dirt trapped beneath polish can create streaks and interfere with the finish.
Always brush away loose debris before applying a polishing product.
Using the wrong polish color
An unsuitable color can alter the appearance of the leather, especially on tan, burgundy, and hand-finished shoes.
Test new products in an inconspicuous area and allow the test spot to dry before evaluating the result.
Using the same brush for every color
A brush carrying black polish residue can transfer pigment onto brown or tan leather.
Ideally, keep separate polishing brushes for dark and light shoes, or thoroughly clean tools between uses.
Polishing leather while it is wet
Applying polish to damp leather can interfere with even distribution and may trap unwanted moisture beneath the finish.
Let shoes dry naturally before polishing.
Using excessive heat
Hair dryers, heaters, and direct heat can dry out leather, affect adhesives, and damage some finishes.
Room-temperature drying is preferable.
Applying heavy wax to creases
The flexible vamp is especially vulnerable to wax cracking.
Keep heavy wax applications on relatively rigid parts of the shoe. Shoe-care specialists also recommend this approach for maintaining a high-shine finish. KirbyAllison.com+1
How to Fix Shoe Polishing Problems
A disappointing finish does not always mean the shoes need to be stripped and polished again.
| Problem | Possible cause | Recommended solution |
|---|---|---|
| Cloudy or hazy finish | Excess wax or moisture | Buff gently and remove buildup if necessary |
| Sticky leather | Too much product | Wipe away residue with a suitable cleaner |
| Uneven color | Poor polish match or application | Test a matching cream and apply evenly |
| White marks in creases | Cracked wax buildup | Carefully remove excess wax |
| No noticeable shine | Insufficient buffing or unsuitable polish | Buff again or use compatible wax |
| Dark spots | Product absorption or moisture | Stop applying products and assess the finish |
| Polish transfers to clothing | Excess surface residue | Buff thoroughly and remove remaining polish |
Why won’t my shoes shine?
Some leather finishes are naturally matte or textured and will never achieve the same reflective appearance as smooth calfskin.
A dull result can also come from residual dirt, excess conditioner, uneven wax, or insufficient buffing.
Clean the surface, remove buildup if needed, and apply a thin layer of appropriate polish.
Do not repeatedly add wax to a surface that is already sticky or cloudy.
How do you remove old shoe polish?
For light buildup, brushing and wiping with a suitable leather-cleaning product may be enough.
Heavy wax deposits sometimes require a dedicated wax remover or stronger leather cleaner.
These products can affect dyes and finishes, so follow their instructions carefully and test first.
Avoid acetone, household paint thinner, and aggressive solvents on finished leather. They can damage the finish and remove color.
If the shoes have a delicate patina or expensive hand-finished leather, professional care may be safer.
Can polishing remove scratches?
Polish can disguise shallow surface scuffs and restore color where minor abrasion has occurred.
However, it cannot fully repair deep cuts, missing leather, cracked coatings, or damaged stitching.
Deep scratches may require leather restoration products or professional repair.
How to Maintain Polished Shoes for Longer
A good shine lasts longer when the shoes are cleaned and stored properly between wears.
Brush shoes after wearing them
A quick brushing removes dust before it becomes embedded in the leather or accumulated polish.
It also helps restore some shine without requiring another product application.
Use shoe trees
Cedar shoe trees help support the shape of leather footwear and can absorb some residual moisture.
They are particularly useful for reducing pronounced creasing during storage.
Choose shoe trees that fit properly rather than forcing oversized ones into the shoes.
Rotate your footwear
Wearing the same leather shoes every day exposes them to repeated moisture and pressure without much recovery time.
Rotating pairs gives the interior materials more opportunity to dry between uses.
Protect shoes from rain and salt
Wax polish provides limited resistance to light moisture, but it does not make ordinary leather dress shoes waterproof.
For wet conditions, consider a protective product compatible with the specific leather finish.
After exposure to road salt or dirty water, clean the shoes promptly and allow them to dry naturally.
Store shoes correctly
Keep polished leather footwear in a cool, dry location away from prolonged direct sunlight.
Breathable shoe bags help protect shoes from dust without sealing moisture inside.
Avoid storing damp shoes in airtight plastic containers.
How Long Does It Take to Polish Shoes?
The time required depends on their condition and the desired finish.
Approximate active polishing time
5–10 min
Quick clean and buff
15–30 min
Routine polishing
30–60+ min
Detailed high-shine work
60+ min
Mirror shine for beginners
Estimates for one pair, excluding extended drying or product-specific curing time.
A basic maintenance shine can be completed relatively quickly. Detailed shoe-care routines, especially those involving several cream or wax layers, require more patience. KirbyAllison.com+1
The key is to allow products to set properly rather than rushing the process.
Final Thoughts on how to polish shoes
Learning how to polish shoes is a practical skill that can improve the appearance and upkeep of leather footwear.
For most smooth leather shoes, the essential routine is simple: remove dirt, condition when necessary, apply a thin layer of appropriate polish, allow it to set, and buff thoroughly.
Cream polish is useful for refreshing color and achieving a natural shine, while wax polish can create a glossier finish on structured areas such as toe caps and heels.
Remember that suede, nubuck, patent leather, and specialty finishes require different care methods.
Start with a gentle clean and a small amount of polish. With regular brushing, appropriate products, and careful storage, your shoes can maintain an attractive finish without excessive polishing.