
A wrinkled shirt can make an otherwise polished outfit look unfinished. The good news is that getting a smooth, crisp finish does not require professional equipment or complicated techniques. What matters most is using the right temperature, adding moisture when appropriate, and ironing the shirt in a sensible order.
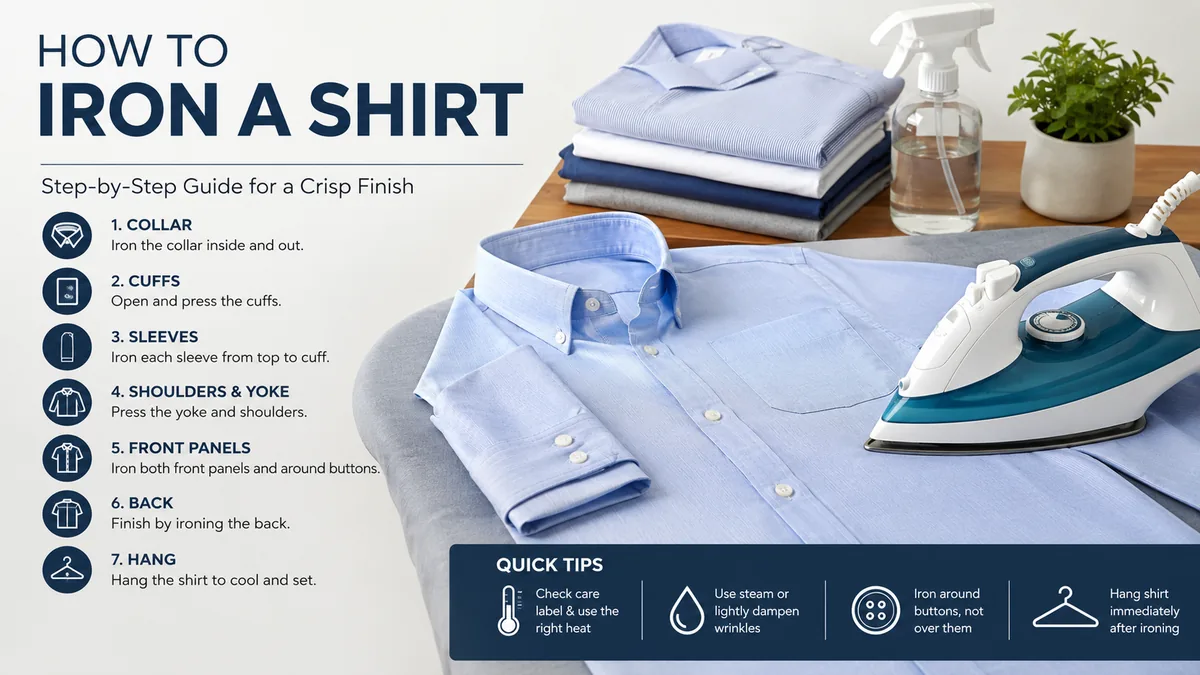
If you’re learning how to iron a shirt, start by checking the care label and setting your iron for the fabric. Unbutton the shirt, lightly dampen stubborn wrinkles, then iron the collar, cuffs, sleeves, yoke and shoulders, front panels, and back. Keep the iron moving, work around buttons, and hang the shirt immediately afterward.
What You Need Before Ironing a Shirt
You don’t need a complicated setup. A few basic tools make the job considerably easier:
- A clean steam iron
- A stable ironing board
- A clean shirt
- A spray bottle filled with water
- A clothes hanger
- A pressing cloth for delicate or dark fabrics
- Optional spray starch for a firmer finish
Check the iron’s soleplate before starting. Residue, rust, or mineral deposits can transfer to clean fabric. Testing the iron on an old light-colored cloth is a simple precaution if you haven’t used it recently.
The shirt should also be clean. Applying heat to an existing stain can make the mark more difficult to remove.
Should a Shirt Be Wet or Dry When Ironing?
Slightly damp fabric is generally easier to press than completely dry fabric. Moisture helps relax fibers, allowing wrinkles to release with fewer passes of the iron. Several professional and clothing-care guides recommend ironing a shirt while it retains a little moisture or lightly misting dry areas before pressing them.
Don’t soak the garment. A fine mist is enough.
For a shirt that has just been washed, remove it from the dryer before it becomes bone dry, or hang it briefly and iron while it is still slightly damp.
Check the Care Label Before You Start
The care label is more important than any universal temperature chart.
Shirts can contain cotton, linen, polyester, silk, rayon, elastane or blends of several fibers. Two shirts that look almost identical may therefore require different temperatures.
A typical starting guide is:
| Shirt Fabric | General Heat Level | Steam | Extra Precaution |
|---|---|---|---|
| Cotton | Medium-high to high | Usually yes | Mist stubborn wrinkles |
| Linen | High if label permits | Usually yes | Iron while damp |
| Cotton-polyester blend | Medium | Usually yes | Avoid excessive heat |
| Polyester | Low | Limited if permitted | Keep iron moving |
| Silk | Low | Follow label | Use a pressing cloth |
| Rayon/viscose | Low | Follow label | Consider ironing inside out |
| Stretch blends | Low | Limited | Avoid prolonged heat |
Cotton and linen commonly tolerate more heat than synthetic fibers, while polyester, silk, rayon and stretch-containing fabrics generally require greater caution. The garment’s care instructions should always take priority over generic recommendations.
When you’re uncertain, start at a low temperature. Increase it gradually only if the care label allows.
How to Iron a Shirt Step by Step
There isn’t one universally mandatory sequence. Professional guides vary slightly, but collar, cuffs, sleeves, shoulders or yoke, and the large body panels consistently form the core process.
For beginners, the following order is easy to remember:
Collar → cuffs → sleeves → yoke and shoulders → front panels → back → final check → hanger
Before starting, completely unbutton the shirt, including the cuffs and any small sleeve or gauntlet buttons. Remove detachable collar stays if the shirt has them.
1. Iron the Collar
The collar is one of the most visible parts of a dress shirt, so take a little extra time here.
Pop the collar up and lay it completely flat on the ironing board.
Start with the underside. Smooth the fabric with your hand before putting the iron down. Work across the collar using controlled passes rather than repeatedly rubbing the iron back and forth.
One useful technique is to work from each collar point toward the center. This helps avoid pushing excess fabric toward the tips and creating puckering.
Turn the collar over and lightly press the visible side.
Once finished, fold it back into its natural position. If you prefer a sharper dress-shirt appearance, apply a light press near the fold rather than flattening the entire collar aggressively.
Quick takeaway: Smooth the collar first, use controlled movements, and don’t over-press its natural curve.
2. Iron the Cuffs
Completely unbutton one cuff and spread it flat.
Press the inside first, then turn it over and press the outside. Work carefully around cuff buttons rather than running the iron directly over them.
Direct heat and pressure can damage some buttons and may leave impressions in the surrounding fabric.
If the shirt has French cuffs, open them fully and press the layers flat before folding them back into position.
Repeat with the other cuff.
3. Iron the Sleeves
Sleeves often cause problems for beginners because an incorrectly positioned sleeve can produce an unwanted double crease.
Take one sleeve and lay it flat along the board. Align the seam carefully and smooth the fabric with your hands.
Before lowering the iron, check that no material is folded underneath.
Iron from the upper sleeve toward the cuff using long, controlled strokes. Flip the sleeve and repeat on the opposite side.
Should Shirt Sleeves Have a Crease?
That’s largely a style choice.
For a traditional dress-shirt finish, you can create a straight crease along the upper edge of the sleeve. Align the fabric carefully before pressing so you create one clean line rather than several overlapping creases.
If you don’t want a sleeve crease, avoid pressing directly over the outer edge. Rotate the sleeve slightly and iron the remaining area instead. Proper Cloth similarly describes the sleeve crease as optional.
Repeat the process with the second sleeve.
4. Press the Yoke and Shoulders
The yoke is the fabric panel running across the upper back of the shirt between the shoulders.
This curved area is difficult to iron while the shirt is lying completely flat.
Slip one shoulder over the narrow end of the ironing board. Smooth the yoke and carefully press the exposed section. Rotate the shirt around the end of the board until you’ve covered the opposite shoulder.
Use the pointed tip of the iron for areas near the collar seam.
Consumer Reports also recommends positioning the yoke over the narrow end of the board so the area can be pressed more easily.
5. Iron the Button-Side Front Panel
Lay the button-side front of the shirt flat on the board.
Start near the shoulder and work downward.
This is where the pointed tip of the iron becomes useful. Guide it carefully between and around the buttons instead of pressing directly on top of them.
Pay attention to the placket, the reinforced strip running vertically along the front of the shirt. It is highly visible when the shirt is worn, so make sure it lies straight.
Don’t rush around the buttons. A few careful movements are better than accidentally scratching the soleplate or damaging a button.
6. Iron the Other Front Panel
Slide the shirt around and lay the buttonhole side flat.
Because there are no raised buttons to navigate, this section is usually much quicker.
Smooth the fabric first, then work from the shoulder toward the hem with long strokes.
If the shirt has a chest pocket, straighten the pocket before ironing. Work around its edges carefully so you don’t press additional wrinkles into the surrounding fabric.
If the pocket is particularly wrinkled, lightly mist it before pressing.
7. Iron the Back of the Shirt
Spread the back across the widest part of your ironing board.
Start at the upper section and work downward, repositioning the garment as necessary. Keep already-pressed sections hanging freely rather than bunching them underneath the area you’re working on.
For shirts with a center box pleat or side pleats, straighten the folds with your fingers before ironing around them.
The back is a large section, so don’t try to cover everything in one position. Move the shirt around the board and work systematically.
The goal is to iron each area once rather than repeatedly moving the shirt and crushing sections you’ve already finished.
How to Iron a Shirt Without Creating New Wrinkles
Removing wrinkles is only half the job. A common beginner problem is accidentally creating new ones while repositioning the garment.
A few habits make a big difference.
Smooth the Fabric Before Every Pass
Never put the iron onto fabric that hasn’t been checked first.
Run your hand across the area and make sure the layer underneath isn’t folded or bunched. Ironing over a small fold can turn it into a sharp crease that’s harder to remove than the original wrinkle.
Let the Iron Do the Work
Avoid fast, jerky movements.
Consumer Reports recommends gently moving the iron rather than fighting the fabric with excessive motion, which can create additional wrinkles.
Use steady strokes and moderate pressure.
Keep the Iron Moving
Leaving a hot iron stationary can scorch or shine fabric, particularly when you’re working with synthetics or dark garments.
If you need to reposition the shirt, return the iron to its upright resting position first.
Don’t Iron Over Buttons
Use the pointed tip to work between buttons.
This protects the buttons and prevents their shape from being pressed into surrounding material.
Use Steam Strategically
Steam can help relax stubborn creases, particularly on fabrics whose care labels permit it.
For a difficult wrinkle, use a short burst of steam or a light spray of water, smooth the fabric, and pass the iron over it again. Consumer Reports notes that stubborn creases can be treated with steam or water before the fabric is dried with the iron.
More steam isn’t automatically better. Delicate and synthetic materials may require lower heat or different treatment, so check the label.
How to Iron Cotton, Linen, and Polyester Shirts
The basic technique remains similar, but the fabric changes how you should use heat and moisture.
Cotton Shirts
Cotton dress shirts are relatively straightforward to iron because they generally tolerate more heat than synthetic fabrics.
If permitted by the label:
- Use a medium-high or high cotton setting.
- Use steam.
- Keep the shirt slightly damp.
- Mist persistent creases.
- Press structured areas carefully before moving to larger panels.
Cotton fibers tend to respond well to the combination of heat and moisture.
Linen Shirts
Linen wrinkles easily, so moisture is particularly useful.
Iron linen while it is still damp when possible and use the temperature permitted by the care label. Steam can help with deep wrinkles.
Don’t obsess over removing every tiny natural line. Linen naturally has a more relaxed texture than a highly pressed formal cotton shirt.
Polyester and Synthetic Shirts
Polyester needs more caution.
Use the low temperature specified on the care label and keep the iron moving. Excessive heat can damage synthetic fibers.
For extra protection, iron the garment inside out or place a clean pressing cloth between the iron and the shirt when appropriate.
Dark-Colored Shirts
Some dark fabrics can develop shiny marks from direct heat and pressure.
Turning the shirt inside out or using a pressing cloth reduces direct contact between the soleplate and the visible surface.
Always test an inconspicuous area if you’re uncertain.
How Do You Remove Stubborn Wrinkles?
If a crease refuses to disappear after one or two passes, repeatedly increasing pressure isn’t the best approach.
Instead:
- Check that the temperature is appropriate for the fabric.
- Lightly mist the wrinkle with water if permitted.
- Allow a few seconds for the moisture to penetrate.
- Smooth the material with your hand.
- Use steam if the care label permits it.
- Press the area again with a slow, controlled pass.
Deep wrinkles often respond better to moisture plus appropriate heat than to force.
If a shirt has been tightly folded or left crumpled for a long time, you may need to treat particularly stubborn sections twice.
Common Shirt-Ironing Mistakes to Avoid
Knowing how to iron a shirt also means knowing what not to do.
Using excessive heat: High temperature doesn’t automatically produce better results. It can damage polyester, silk, rayon, stretch fibers, prints and other heat-sensitive materials.
Ignoring the care label: Fabric appearance alone isn’t enough to determine the correct setting.
Ironing a dirty shirt: Heat may make existing stains harder to remove.
Pressing over buttons: This can damage buttons and create marks.
Ironing completely dry cotton: A small amount of moisture often makes stubborn wrinkles much easier to release.
Leaving the iron stationary: Even a few unnecessary seconds can cause scorching or shine.
Ironing over hidden folds: Always check the fabric underneath before applying pressure.
Creating double sleeve creases: Align the sleeve carefully before pressing its edge.
Overusing starch: Starch can create a very crisp finish, but excessive application may leave residue or make the fabric unnaturally stiff.
Folding the shirt immediately: Freshly pressed fabric can wrinkle again while it is still warm.
How to Iron a Shirt Without an Ironing Board
An ironing board is convenient, but it isn’t essential.
Use a clean, flat, heat-resistant surface such as a sturdy table covered with a thick folded cotton towel. Make sure the surface underneath won’t be damaged by heat or moisture.
Avoid ironing directly on delicate furniture, plastic surfaces, glass, or anything with a finish that could react to heat.
The technique remains the same: flatten one section at a time, check that nothing is bunched underneath, and keep the iron moving.
A board’s narrow end makes shoulders and the yoke easier, so these curved sections may require more repositioning when you’re using a table.
Can You Get Wrinkles Out Without an Iron?
If you don’t have access to an iron, you can still reduce light wrinkles, although the result usually won’t be as crisp as traditional pressing.
A garment steamer is the most straightforward alternative. Hang the shirt and work systematically from top to bottom according to the steamer’s instructions.
For minor wrinkles, hanging the shirt promptly after washing and smoothing it by hand can reduce the amount of pressing required later.
The key distinction is that steaming is excellent for relaxing wrinkles, while an iron provides direct heat and pressure that can create sharper collars, cuffs, plackets, and sleeve creases.
How Long Does It Take to Iron a Shirt?
Technique matters more than speed.
An experienced person can press a straightforward cotton dress shirt in only a few minutes, while someone learning the process may take considerably longer. Consumer Reports notes that following every traditional pressing detail could take 10–15 minutes, but an efficient sequence can reduce the time substantially.
Don’t chase a specific time on your first attempt.
Focus on:
- Correct temperature
- Smooth fabric
- Controlled strokes
- Minimal repositioning
- Avoiding new creases
Speed comes naturally once the sequence becomes familiar.
What to Do Immediately After Ironing
Don’t finish the last panel and throw the shirt onto a chair.
Inspect the garment under good light. Look closely at the collar, cuffs, shoulders, sleeves, button placket and lower front where overlooked creases are easiest to spot.
Then place the shirt on a hanger immediately.
Allow it to cool and dry completely before putting on a jacket, folding it, or packing it into a crowded wardrobe. Hanging a freshly ironed shirt helps preserve the finish instead of immediately introducing new folds.
Leave enough space around it in the wardrobe that neighboring clothes aren’t crushing the sleeves and body.
A Faster Routine Once You’ve Practiced
Once you’re comfortable with the full process, ironing doesn’t need to become a long household task.
Prepare everything before the iron reaches temperature. Have the board ready, shirt unbuttoned, spray bottle nearby, collar stays removed, and hanger waiting.
Then follow the same sequence every time:
- Check the label and select the correct heat.
- Lightly mist dry wrinkles if appropriate.
- Press the collar.
- Open and press the cuffs.
- Flatten and iron both sleeves.
- Press the yoke and shoulders.
- Iron both front panels and the placket.
- Finish the back.
- Inspect for missed wrinkles.
- Hang the shirt immediately.
Repetition is what makes the process fast. You stop wondering where to put the shirt next and simply move around it in a consistent order.
Final Takeaway
Learning how to iron a shirt is mostly about controlling three things: heat, moisture, and sequence.
Always begin with the care label rather than assuming every shirt can handle the same temperature. Work on a clean garment with a clean iron, use moisture when the fabric allows it, and smooth each section before applying heat.
For an easy routine, remember collar, cuffs, sleeves, shoulders, front, back. Iron around buttons instead of over them, keep the soleplate moving, and use the narrow end of the board for the yoke and shoulders.
Once you’re finished, hang the shirt immediately and let it cool. After a few attempts, the entire routine becomes quicker, and getting a clean, crisp, wrinkle-free shirt becomes far more predictable.