
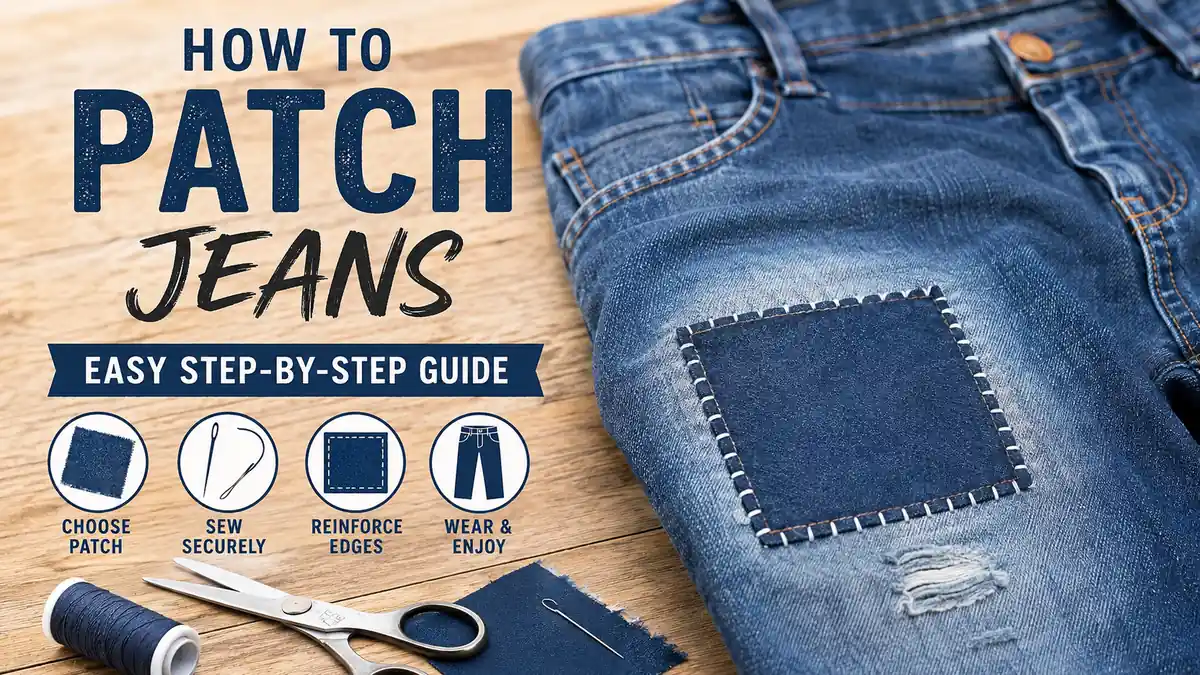
A hole in your favorite jeans does not mean they are finished. Denim is remarkably repairable, and a well-placed patch can strengthen worn fabric while keeping the fit and character you already like.
Learning how to patch jeans comes down to three things: choosing a patch larger than the damaged area, securing it to healthy denim, and reinforcing the weak fabric with suitable stitching. You can make a subtle repair from inside the jeans, create a visible decorative patch, use sashiko-style stitching, or make a quick fix with an iron-on patch.
Quick answer: To patch jeans, trim loose threads, cut a denim patch larger than the hole, position it behind or over the damaged area, and secure it with hand stitching, machine stitching, or heat-activated adhesive. For a longer-lasting repair, extend the patch into strong surrounding denim and reinforce worn edges with stitches.
How to Patch Jeans: Choose the Right Repair Method
Before reaching for a needle or iron, inspect the damage.
A clean rip is different from a large area of denim that has gradually worn paper-thin. If you simply close a hole while ignoring weak fabric around it, another tear may appear beside your repair.
The main approaches are:
| Repair method | Best for | Sewing required? | Appearance | Durability |
|---|---|---|---|---|
| Hand-sewn patch | Small to medium holes | Yes | Subtle or decorative | High |
| Sewing-machine patch | Large or high-stress damage | Yes | Usually subtle | Very high |
| Iron-on patch | Small tears and quick repairs | No | Usually visible/subtle | Moderate |
| Darning | Thin, fraying denim | Yes | Can blend into denim | Very high |
| Sashiko-style repair | Visible mending | Yes | Decorative | High |
| Fabric adhesive | Temporary/simple repairs | No | Depends on patch | Moderate |
A sewn patch is generally the safest choice when the damaged area receives regular friction, such as the knees, inner thighs, seat, or pocket corners. Iron-on patches are convenient, but adding stitches around them can improve their resistance to repeated washing and movement. Howcast, for example, recommends securing an iron-on patch and then reinforcing it with straight and zigzag stitching.
Should a jeans patch go inside or outside?
Either placement works.
Put the patch inside the jeans when you want the original denim to remain visible. The patch acts as a backing beneath the hole and provides new material for your stitches to grab.
Put the patch outside when you want visible mending or a decorative design.
Clothes Doctor describes both approaches: an internal patch creates a subtler result, while an external patch can deliberately become part of the garment’s appearance.
For everyday repairs, an inside patch is usually the easiest way to preserve the original look.
What You Need to Patch Jeans
You do not need a professional sewing kit.
For a basic denim repair, gather:
- A denim scrap, premade patch, or other sturdy fabric
- Fabric scissors
- Needle
- Strong thread
- Straight or safety pins
- Fabric marker or tailor’s chalk
- Iron and ironing board
- Iron-on adhesive or fusible web, if desired
- Sewing machine, if available
- Denim sewing-machine needle for machine repairs
- Thimble for difficult hand stitching
Old jeans are an excellent source of patch material. Save sections of usable denim from jeans that are too damaged to wear.
For an inconspicuous repair, choose denim close to the weight and color of the jeans. It does not have to match perfectly because faded jeans often contain several shades of blue.
Decorative repairs give you more freedom. Contrasting denim, cotton prints, embroidery thread, or sashiko thread can turn the damaged area into a deliberate design feature.
How much bigger should a patch be than the hole?
The patch must extend beyond the damaged fabric.
Several repair guides recommend leaving a meaningful margin around the tear rather than cutting the patch to the exact dimensions of the hole. Taylor Stitch recommends at least ¼ inch beyond the opening, while other practical repair methods use approximately an inch or more where additional reinforcement is necessary.
A useful rule is:
Small, clean tear: extend the patch at least ½ inch beyond the damage.
Large or heavily worn area: extend it roughly 1 inch or farther into strong denim.
Look beyond the visible hole. If the surrounding fibers are thin, pale, fuzzy, or easy to pull apart, cover that weakened area too.
How to Patch Jeans by Hand
Hand sewing is one of the most accessible ways to repair denim because it requires no sewing machine and gives you precise control over the stitches.
1. Wash and dry the jeans
Start with clean jeans.
Washing removes dirt, oils, and lint that could interfere with fusible adhesive. It also means the fabric is in its normal washed state before you attach the patch.
Avoid repairing damp denim.
2. Inspect the entire damaged area
Lay the jeans flat and examine the hole.
Gently pull around its edges to identify weakened fabric. Pay particular attention to:
- Frayed threads
- Thin denim
- Small neighboring tears
- Loose seams
- Worn pocket corners
- Fabric that stretches excessively
Your patch should support all of the structurally weak material, not merely hide the visible opening.
3. Trim loose threads
Use sharp fabric scissors to remove long, tangled threads that will interfere with sewing.
Do not aggressively cut away every frayed fiber. Removing too much material makes the hole larger and eliminates original denim that can help visually blend the repair.
If you want a distressed or visible-mending appearance, some fraying can remain. Taylor Stitch similarly notes that trimming frayed material creates a cleaner finish, while leaving some of it can contribute to the character of the repair.
4. Cut the patch
Cut your denim patch so it covers the hole and the weakened fabric surrounding it.
Rounded corners are useful because there are no sharp points to lift or catch. An oval, circle, or rounded rectangle works particularly well on knees and thighs.
If the patch fabric frays easily, finish its raw edges with a zigzag stitch or fold the edge inward before hand sewing.
5. Place the patch behind the hole
Turn the jeans inside out.
Center the patch over the damaged area and pin it securely. Then turn the jeans right side out and check that the entire hole has backing fabric beneath it.
Do not stretch the jeans while pinning.
The denim should lie naturally over the patch. If you pull the fabric too tightly, the finished repair can pucker when you wear the jeans.
6. Thread the needle
Choose thread that matches the denim for a discreet repair.
For visible mending, use contrasting embroidery or sashiko thread.
A thimble is helpful because multiple layers of denim can be difficult to penetrate. Use a strong, sharp needle rather than forcing a delicate needle through thick seams.
7. Sew the patch securely
A basic running stitch works for light repairs, but a backstitch provides greater security around a patch.
Sew through both the jeans and backing patch, placing your stitches in healthy denim rather than along the fragile edge of the hole.
Continue around the damaged area until the patch cannot shift.
For a larger worn spot, add parallel rows of stitches across the patch. These stitches distribute stress across a wider area instead of concentrating it along one line.
8. Secure the thread
Finish on the inside of the jeans.
Make several small securing stitches and tie off the thread. Trim the excess without cutting too close to the knot.
Check the front of the repair for puckering and gently flatten the fabric with your hands.
Quick Takeaway: The strongest hand repair does not simply sew a patch around the perimeter. It also stabilizes thin denim around the hole so movement and friction are distributed across the patch.
How to Patch Jeans With a Sewing Machine
A sewing machine is especially useful for repairing large holes, inner-thigh wear, torn knees, and areas where the original denim has become thin.
Machine darning can make a patch almost disappear into faded denim.
Prepare the patch
Turn the jeans inside out and place matching denim or another sturdy woven fabric behind the damaged section.
You can temporarily hold it with:
- Pins
- Basting stitches
- Fusible web
- Fabric adhesive designed for sewing
If you use adhesive, keep heavy glue away from areas where repeated needle penetration could become difficult.
Use the right needle and thread
Install a denim or jeans needle suitable for the thickness of your fabric.
Choose thread close to the dominant color of the worn area—not necessarily the original dark color of the jeans.
This matters with faded blue denim. A light blue-gray thread can blend far better into a worn knee than dark indigo.
Stitch beyond the tear
Start in solid fabric before reaching the hole.
Sew back and forth across the damaged section with a straight stitch, gradually covering the worn area.
Needlepointers describes a similar approach: straight stitching can be worked repeatedly across the hole when a dedicated darning stitch is unavailable, catching the backing patch underneath as the damaged section is reinforced.
Change direction occasionally rather than creating one dense line of stitches.
The goal is to connect the patch to healthy denim and recreate structural support where the original fibers have disappeared.
Trim the excess backing
Once the repair is secure, turn the jeans inside out.
Carefully trim unnecessary patch fabric, leaving enough material beyond the outermost stitches that the backing remains secure.
Do not cut through your stitching.
What if the pant leg will not fit around the machine?
Knee repairs can be awkward because the narrow leg prevents you from positioning the damaged section beneath the presser foot.
First see whether removing the machine’s accessory tray provides enough free-arm space.
For difficult repairs, experienced sewists sometimes open an accessible leg seam, perform the repair while the fabric lies flat, and then reconstruct the seam. This is more advanced and is unnecessary for most small patches.
If opening the seam would mean disturbing complicated original construction or heavy topstitching, hand sewing may be easier.
How to Patch Jeans With an Iron-On Patch
Iron-on patches are convenient when you want to fix jeans without extensive sewing.
They use a heat-activated adhesive that bonds the patch to the fabric.
Step 1: Prepare the damaged denim
Wash and completely dry the jeans.
Trim troublesome loose threads and flatten the area as much as possible.
Step 2: Cut the patch
Cut the iron-on patch larger than the damaged section.
Rounded corners can reduce the chance of edges catching or lifting.
Step 3: Position it correctly
For a hidden repair, turn the jeans inside out and position the adhesive patch behind the hole.
Check the product instructions carefully because adhesive orientation and application procedures differ among manufacturers.
Step 4: Apply heat
Place the jeans on an ironing board or another suitable heat-resistant surface.
Use the temperature and pressing time specified by the patch manufacturer. Some methods call for firm stationary pressure rather than moving the iron continuously across the patch.
A pressing cloth can protect the garment and iron where appropriate.
Step 5: Let the adhesive cool
Do not immediately pull at the patch.
Allow it to cool and bond, then inspect every edge.
Step 6: Add stitches for a more permanent repair
Iron-on adhesive is useful for holding fabric in place, but areas that bend and rub repeatedly can eventually lift.
Stitching around the patch provides mechanical reinforcement in addition to the adhesive bond. Howcast’s repair method combines ironing with straight and zigzag stitching for this reason.
This combination works particularly well for children’s jeans and frequently worn work jeans.
How to Patch Jeans With Sashiko-Style Visible Mending
Not every repair needs to disappear.
Visible mending intentionally highlights the repaired area with contrasting fabric and decorative stitches.
One of the best-known approaches is inspired by sashiko, a Japanese stitching tradition associated today with geometric running-stitch patterns and textile reinforcement. Related visible-mending discussions frequently reference boro, historically associated with repeatedly patched and repaired Japanese textiles. Closet Core Patterns specifically uses these traditions as inspiration for decorative denim repair.
Levi’s also includes sashiko among its denim repair techniques.
Choose contrasting materials
Try:
- Indigo denim with white thread
- Light denim with dark blue thread
- Patterned cotton beneath a torn knee
- Multiple overlapping denim scraps
- Embroidery thread for stronger visual contrast
Place the patch behind the hole and secure it with pins or temporary basting.
Create rows of running stitches
Work a simple running stitch through the original denim and patch.
Keep the stitches reasonably even, but do not obsess over mathematical perfection. Handmade variation is part of the appeal.
You can sew:
- Parallel horizontal lines
- Vertical lines
- Crosshatch grids
- Diamonds
- Waves
- Traditional-inspired geometric patterns
Taylor Stitch’s sashiko repair method similarly places a patch behind the damage and works stitching through the layered fabric to secure and decorate the repair.
Extend the stitching beyond the hole
Do not stop precisely at the torn edge.
Continue into sound denim around it. This strengthens the weakened transition between the original material and the patch while making the design appear intentional.
Visible mending is particularly effective when an invisible repair would be difficult because the jeans have unusual fading or a large hole.
How to Patch Jeans at the Knee
Knees are among the most demanding repair areas because the fabric repeatedly bends, stretches, and rubs against surfaces.
A tiny patch placed exactly over the opening often fails.
Instead, inspect the entire knee panel.
Use a larger backing patch
Cover both the hole and the thin denim surrounding it.
If the knee has worn into a broad horizontal tear, your backing may need to extend considerably above and below the opening.
Place it inside the jeans for a discreet appearance.
Keep the knee flexible
More stitches do not automatically mean a better repair.
Dense layers of thread, adhesive, and thick fabric can make the knee stiff. Use enough stitching to distribute stress without turning the area into a rigid panel.
For children’s jeans, where knees often experience heavy abrasion, an external decorative patch can be practical because it places a sacrificial layer directly over the high-wear area.
Reinforce the second knee when necessary
Compare both legs.
If one knee has worn through and the other is already becoming thin, reinforcing the intact knee from inside can prevent another hole.
This preventive approach is also used with iron-on patches: reinforcement can be installed behind thinning fabric before the original denim completely wears through.
How to Repair Ripped Jeans Between the Thighs
Inner-thigh damage requires a different approach from a decorative knee patch.
Friction usually wears the denim gradually until a large area becomes extremely thin. Simply sewing the edges of the hole together concentrates tension in already weakened fibers.
Patch the entire worn zone
Turn the jeans inside out and identify where the denim changes from thin to structurally sound.
Cut a lightweight-to-medium denim patch that covers this complete area.
Avoid an unnecessarily heavy patch because extra bulk between the thighs can be uncomfortable.
Match the thread to the faded denim
Turn the jeans right side out.
Using a sewing machine, stitch repeatedly over the worn section, following the direction and color of the existing denim as closely as practical.
This technique is a form of darning.
Darning repairs worn fabric by creating a network of new stitches across the damaged section. It is particularly useful for areas such as knees, pockets, and between-the-leg wear.
Avoid creating a hard edge
Gradually reduce the amount of stitching as you reach healthy denim.
A rigid rectangle of dense stitching can create a new stress point at its boundary. A more gradual transition allows the repair to move with the garment.
For severe inner-thigh wear on expensive or difficult-to-replace jeans, professional denim darning may produce a more refined result.
How to Fix Small Holes Before They Become Large
The best time to patch jeans is often before there is a true hole.
Look for warning signs:
- Fabric becoming noticeably lighter
- Fuzzy fibers
- Thin spots visible against light
- Small broken threads
- Stress around pocket corners
- Fraying near belt loops
- Inner-thigh abrasion
- Tiny knee splits
Turn the jeans inside out and place a small piece of lightweight denim or suitable reinforcement behind the weak section.
Then stitch through the area before more fibers break.
Preventive reinforcement uses less patch material, requires fewer stitches, and generally produces a less noticeable repair.
How to Make a Jeans Patch Look Almost Invisible
Perfectly invisible mending is difficult on denim because jeans naturally fade according to wear patterns.
You can still make a repair surprisingly discreet.
Match the worn color, not the original color
Look directly around the hole.
A pair of dark indigo jeans might be pale blue at the knee. Thread matching the original waistband could stand out dramatically against that faded area.
Select your thread under natural light when possible.
Put the patch underneath
An internal backing preserves as much original surface denim as possible.
The remaining frayed fibers sit over the patch and help break up its outline.
Use multiple thread colors
Real denim rarely appears as one flat color.
For machine darning, alternating between two close shades can mimic natural variation better than covering the area with one solid block.
Follow the fabric’s visual direction
Traditional denim is a twill fabric with visible diagonal structure.
Your repair does not have to reproduce the weave exactly, but stitching that visually blends with the existing grain and fading is less obvious than a sharply contrasting geometric block.
MindyMakes demonstrates this backing-and-darning approach by fusing a patch behind the jeans and stitching over the damaged section in several directions to create a relatively subtle repair.
Common Mistakes When Learning How to Patch Jeans
Most unsuccessful repairs fail because of preparation or placement rather than complicated sewing problems.
Cutting the patch too small
A patch attached to fragile fibers cannot provide much support.
Extend it into healthy denim.
Sewing only around the hole
Closing the perimeter may leave the surrounding worn fabric unsupported.
When the area is thin, reinforce across it as well.
Pulling the fabric tight
Stretching the denim while you sew can produce puckering or an uncomfortable repair.
Lay the garment in its natural position.
Using a very thick patch
More thickness is not always more durable.
A heavy patch behind lightweight stretch denim can create a stiff spot and transfer stress to the patch boundary.
Choose backing fabric reasonably compatible with the jeans.
Ignoring stretch denim
Many modern jeans contain elastane or other stretch fibers.
A completely rigid repair over a highly flexible area can alter how the jeans move. Use a reasonably flexible patch and avoid excessively dense stitching when repairing stretch jeans.
Using an unsuitable machine needle
Ordinary lightweight needles may struggle with several layers of denim.
Use a suitable denim/jeans needle and slow down around thick intersections and seams.
Sewing pockets shut
Before starting, check what lies behind the damaged area.
When repairing a back pocket, front pocket, or pocket-adjacent tear, keep the pocket bag out of the stitching path unless it is intentionally part of the repair.
Ironing without checking patch instructions
Heat settings vary among adhesives, patches, decorative appliqués, and fabrics.
Do not assume the hottest iron setting is appropriate for every repair. Follow the manufacturer’s instructions, particularly with stretch fabrics, coated denim, or decorative materials.
How to Make a Denim Repair Last Longer
A good patch should move with your jeans rather than simply cover a hole.
Several habits improve longevity.
Repair early. Reinforcing thinning fabric is easier than rebuilding a large missing section.
Anchor into strong denim. The patch and stitches need structurally sound material around them.
Reduce sharp corners. Rounded patch edges are less likely to catch.
Reinforce high-friction areas. Knees, thighs, pockets, and the seat generally need more structural support than a small decorative tear.
Combine adhesive and stitching when useful. Fusible material can stabilize the patch while sewing provides long-term mechanical attachment.
Inspect the repair after washing. Look for lifting edges, broken stitches, or new thinning around the perimeter.
Avoid unnecessary stiffness. Too much thread or overly thick backing can make the garment uncomfortable and shift stress elsewhere.
Levi’s presents fabric patching and sashiko mending as practical ways of keeping worn denim in use rather than treating a tear as the end of the garment.
Can You Patch Jeans Without Sewing?
Yes.
An iron-on patch or suitable fabric adhesive can repair some holes without a needle and thread.
For a quick iron-on repair:
- Wash and dry the jeans.
- Trim excessive loose fibers.
- Cut the patch larger than the hole.
- Position it over or behind the damaged area.
- Follow the patch manufacturer’s heat instructions.
- Allow the adhesive to cool completely.
- Check the edges before wearing the jeans.
No-sew methods are most useful for relatively small areas where the fabric surrounding the damage remains strong.
They are less ideal for heavily stressed areas. A knee bends thousands of times, inner thighs experience repeated friction, and pocket corners are frequently pulled. In these locations, stitching usually provides more reliable reinforcement.
If you genuinely cannot sew, a carefully applied adhesive repair can still extend the useful life of the garment. Just treat it as something worth inspecting periodically rather than assuming it will remain permanent.
Should You Sew a Patch or Iron It On?
Choose based on the location and condition of the jeans.
For a small, low-stress tear, an iron-on patch may be enough.
For a knee hole, use a sewn patch or combine adhesive with stitching.
For inner-thigh wear, backing plus machine darning is generally more suitable.
For a large hole, use a generously sized sewn backing patch.
For decorative repairs, use visible hand stitching, embroidery, or sashiko-style mending.
For thin fabric that has not torn yet, reinforce it from the inside before a hole develops.
For heavy work jeans, prioritize structural stitching over appearance.
The condition of the surrounding fabric matters more than the dimensions of the visible hole.
When Is a Hole Too Large to Patch?
There is no strict maximum hole size.
Even substantial missing sections of denim can be reconstructed with patches. The practical question is whether enough strong original fabric remains to support the repair.
A home patch becomes more challenging when:
- The tear reaches a major structural seam
- Several seams are failing simultaneously
- The crotch seam itself is damaged
- A zipper area is torn
- Large sections of surrounding denim are extremely thin
- Belt loops have ripped chunks from the waistband
- The repair would require rebuilding the shape of the garment
These problems may require opening and reconstructing seams rather than simply placing fabric behind a hole.
A tailor or specialist denim repair service may be worthwhile when the jeans are valuable, fit particularly well, or require extensive reconstruction.
How to Care for Patched Jeans
Give a new repair a quick inspection before its first wash.
Make sure there are no loose threads and that iron-on edges are fully bonded.
When washing, turn the jeans inside out. This reduces direct abrasion against the repaired surface, particularly when the patch includes decorative stitching or an appliqué.
Follow the care requirements of the original jeans and any patch or adhesive you added. Decorative iron-on elements may have their own washing and drying restrictions; some patch manufacturers, for example, recommend gentler laundering or specific temperature limits.
After washing, inspect high-stress repairs.
One broken stitch is easy to replace. Waiting until several stitches fail may allow the original tear to start spreading again.
How to Patch Jeans for a Repair That Actually Lasts
The most reliable answer to how to patch jeans is to repair more than the hole you can see.
Prepare the damaged denim, place a sufficiently large patch into healthy surrounding fabric, and choose your attachment method according to how much stress that area receives. Hand stitching works well for accessible repairs, machine darning is excellent for extensive wear, and iron-on patches provide a straightforward no-sew option.
If appearance matters, decide before you start whether you want the repair to disappear or become part of the design. Matching denim and thread create a subtle finish, while contrasting fabric and sashiko-style stitches turn damage into visible mending.
Most importantly, do not wait for a tiny weak spot to become a large tear. Reinforcing thinning denim early requires less work and gives your favorite jeans a much better chance of staying in regular use.